How to Harvest and Dry Lavender for Kitchen Use
- Culinary lavender begins with a name, not a colour
- Pick the stage that matches the use
- Keep culinary and craft harvests separate
- Prepare the stems for drying
- Air-dry small bundles
- Dry on a screen or tray
- Decide when it is fully dry
- Strip and store without losing the label
- Use culinary lavender like a powerful herb
- Save part of the bloom for the plant and pollinators
- A reliable harvest in one sequence
Culinary lavender begins with a name, not a colour
Before cutting lavender for food, identify the plant by scientific name and confirm that it was sold or grown for culinary use. English lavender (Lavandula angustifolia) is commonly preferred for its comparatively sweet fragrance; some other types taste sharply camphoraceous. Species, cultivar, treatment history, and site all matter.
Do not eat unknown ornamental lavender, florist stems, roadside plants, or material exposed to animal waste or pesticides not labelled for food crops. A flower can smell like a bakery and still lack an invitation to the kitchen.
Keep a permanent plant label and a harvest label. If several lavenders grow together, map them before bloom. Dry grey buds become surprisingly skilled at concealing their biographies.
Pick the stage that matches the use
For fragrant dried bundles and buds, cut stalks when buds are coloured and the first flowers are opening. Illinois Extension recommends this stage for the strongest scent. A later cut with more open flowers suits fresh visual use but may shed more during drying.
Harvest after morning dew has dried and before the day's strongest heat. Choose a dry forecast if possible. Wet stems take longer to dry and are more vulnerable to spoilage; midday heat can reduce fragrance and wilts cut material quickly.
Inspect the plant. Skip stems with mould, unexplained spotting, insect residue, or contamination. Harvest from healthy growth and leave enough leafy framework for the perennial to recover. Never cut down into bare old wood; the lavender pruning guide shows the boundary.
Use clean, sharp snips. Cut long stems above leafy growth, gather them loosely, and move them out of direct sun. Do not crush or pack fresh stalks into a warm sealed bag. Aroma is stored in delicate oil glands, and a sweating plastic parcel is not their preferred accommodation.
Keep culinary and craft harvests separate
Use separate labelled containers for food-grade, ornamental, and craft material. If a plant has been treated with a garden product, read the full label. Unless the product is labelled for that edible crop and the harvest interval has been followed, keep the material out of food.
This separation becomes essential when making sachets from whatever grows prettily. Craft lavender can be perfectly useful without being edible. Do not let one attractive bowl in the kitchen silently promote it.
Lavender essential oil is not made by crumbling extra buds into a jar and should not be improvised for ingestion. Concentrated oil has different risks covered in the essential-oil safety guide.
Prepare the stems for drying
Oregon State University Extension's herb-drying guidance advises rinsing herbs in cool water, shaking off excess, and discarding bruised or imperfect material. Follow that food-preservation guidance for culinary batches. Never use soap or household cleaner.
Remove surface water thoroughly with gentle shaking and clean towels or a salad spinner reserved for suitable herbs. Spread the stems briefly so no droplets remain trapped before bundling. If the harvest is dusty or contaminated beyond a sensible rinse, discard it rather than asking drying to perform sanitation magic.
Label immediately with plant name, cultivar if known, purpose, and date. Use food-safe string, rubber bands, or racks. Rubber bands contract with drying stems and can hold a bundle together, but bundles still need to be small enough for air to reach the centre.
Air-dry small bundles
Gather a small number of stems and secure them near the cut ends. Hang the bundle flower-side down in a dark, dry, warm, well-ventilated place. Darkness helps preserve colour; airflow carries moisture away. Protect the area from dust, insects, cooking steam, direct sunlight, and pet access.
Do not hang a thick bouquet as one unit. The outside can become crisp while the centre remains damp. Divide a showy armful into several modest bundles with visible gaps between them. A paper bag loosely around each bundle can catch falling buds and exclude dust if it does not restrict airflow; make ventilation holes and never use sealed plastic.
Check every day at first. Rotate or separate bundles if the centre remains cool or damp. A musty odour, visible mould, or slimy stem means disposal, not a longer appointment with the fan.
Dry on a screen or tray
Short stems and loose buds can dry in a single layer on a clean food-safe screen or mesh tray. Air must circulate around the material. Turn gently as needed and keep varieties separate.
Avoid piling buds on a solid baking sheet at room temperature. Moisture trapped under the layer slows drying. If using a dehydrator, follow a tested herb-drying method and the appliance instructions. Excessive heat drives off flavour; OSU notes that high drying temperatures can reduce quality.
Do not use an oven setting merely because it feels quick. Many ovens run too hot or cycle unevenly for delicate herbs. A verified low-temperature method is preferable to discovering that the lavender has become grey toast.
Decide when it is fully dry
Drying time varies with humidity, airflow, stem thickness, bundle size, and method. A universal number of days would be theatre. Test the thickest stems and the centre of several bundles.
Fully dried buds feel dry rather than cool or pliable. Stems should snap or break cleanly instead of bending with hidden moisture. Rub a small sample between fingers; it should separate readily without softness. Check for condensation by closing a small test portion in a clear jar for a day. If moisture appears, return the batch to drying only if it remains sound and clean.
If stored material later becomes damp, clumps, smells musty, or shows mould, discard it. Do not scrape off the visible patch or use the rest in food. Mould extends beyond what the eye politely points out.
Strip and store without losing the label
Place a clean sheet or bowl under a dry bundle. Roll the flower heads gently between clean hands or pull stems through fingers so buds fall. Remove obvious stem pieces and inspect for debris. Keep the plant label beside the batch from beginning to sealed jar.
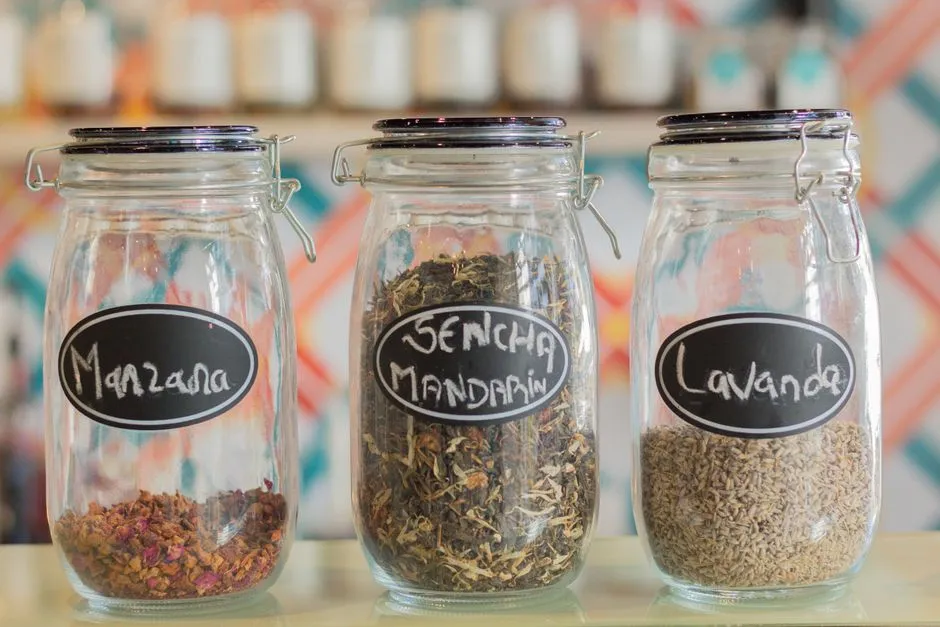
Store fully dry culinary lavender in a clean airtight food-safe container in a cool, dark, dry cupboard. Clear glass is fine inside darkness, not on a sunny shelf. Label scientific name, cultivar or source, harvest date, and any relevant treatment record.
OSU says properly dried herbs can maintain useful quality for up to about a year under cool, dark, dry storage, but aroma fades differently. Smell and taste a tiny amount before use. A faded batch may be disappointing; a damp or mouldy batch is discarded.
Keep dried lavender away from strong odours and steam. Open the jar briefly with dry hands and a dry spoon. A teaspoon held above a boiling pot exposes the whole supply to exactly the humidity you worked to remove.
Use culinary lavender like a powerful herb
Lavender can flavour sugar, shortbread, syrups, tea blends, and savoury dishes, but it becomes perfumelike when overused. Start with a tested recipe from a reputable food source, use the identified culinary material it specifies, and measure lightly. Grind with sugar only when the recipe calls for it.
Do not extrapolate culinary directions from essential-oil drops. Dried flowers and distilled concentrated oil are not equivalent by volume, chemistry, or risk. “More lavender” is rarely the missing layer in a cake that already tastes like hand lotion.
Disclose lavender as an ingredient when serving others. Anyone with an allergy or medical dietary concern should avoid experiments and seek appropriate advice. Decorative sprigs should not touch food unless they meet the same identification and treatment standards as the ingredient.
Save part of the bloom for the plant and pollinators
Harvest in sections rather than stripping every spike at once. Flowering lavender attracts bees and other insects; leave an area undisturbed and work calmly. Do not spray open flowers with products harmful to pollinators or contrary to the label.
Use the container lavender guide to keep the source plant in full sun with a dry crown and healthy roots. A stressed plant should recover before another harvest.
Keep all fresh and dried lavender away from pets. ASPCA lists common/English lavender as toxic to dogs, cats, and horses. Contact a veterinarian or animal poison service promptly after suspected ingestion or concerning signs.
A reliable harvest in one sequence
Identify culinary lavender and verify treatment history. Cut healthy stalks as early blooms open, after dew dries. Rinse and prepare according to tested preservation guidance. Dry small labelled bundles or a single layer with darkness and airflow. Confirm complete dryness, then strip into a clean airtight labelled jar.
The system is not glamorous, but the jar will contain what you think it contains. In a spice cupboard, that is a remarkably luxurious outcome.